Advanced Material Editing
This guide will assume you have at least some understanding of how PBR texturing works.
Note
There is a Substance Painter Export Template if you use Substance to export the PRM map so you don't have to construct it.
Preparation
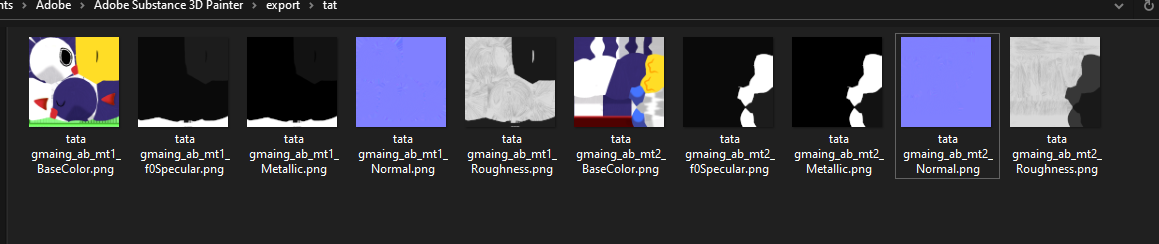
This guide expects you to have a model that loads ingame and 5 texture maps for your model:
- An
Ambient OcclusionMap (if you do not want this make a solid1texture) - A
MetallicMap (if you do not want this make a solid0texture) - A
f0 SpecularMap (if you do not want this make a solid0.25texture) - A
RoughnessMap (if you do not want this make a solid0.8texture) - An
OpenGL, Y+/Y up, Green+/Green upMap (if you do not want this make a solid0.5, 0.5, 1texture)
Making a PRM map
Hedgehog Engine 2 games use some variation of the PRM texture setup, Frontiers specifically uses the RGBA setup, Specular, Smoothness, Metallic, Ambient Occlusion. So we need to construct a map using our textures, as long as the textures go into the corresponding channels.
Photoshop
Add your textures besides the Normal Map textures as layers in your photoshop document.

Then open the effects panel and have the corresponding channel as stated above be the only channel checked

Lastly select your Roughness layer and invert it (Ctrl+I). Smoothness in PBR is just inverted roughness.
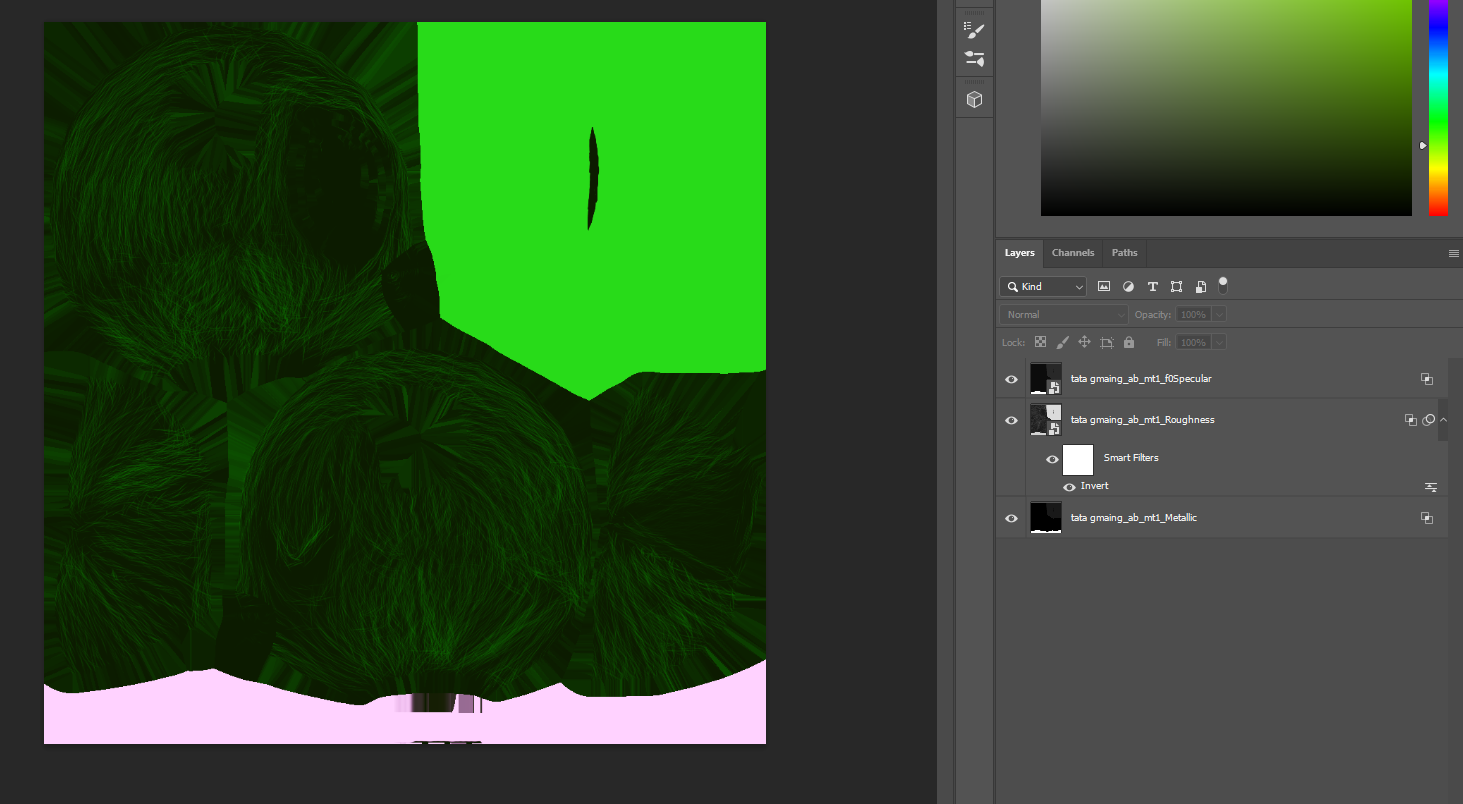
This will be your PRM map. Save it to your work directory.
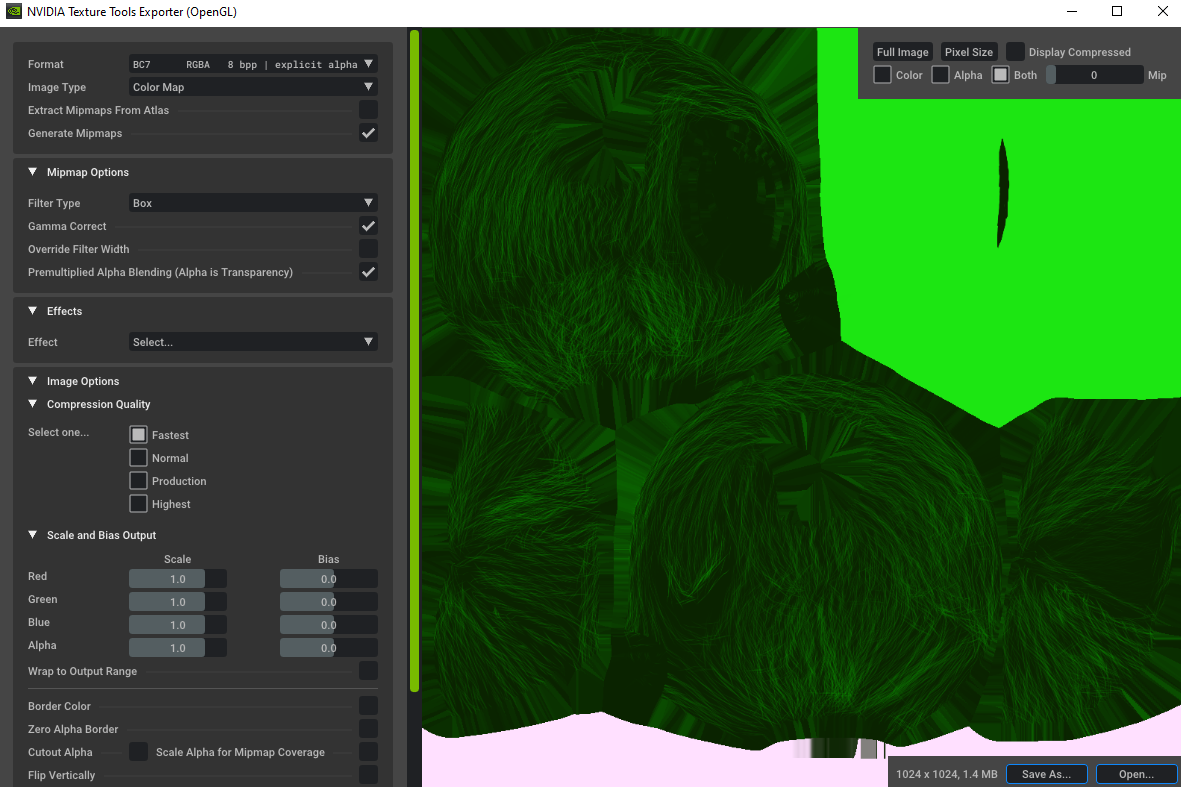
Converting PNG to DDS correctly
Open Nvidia Texture Tools Exporter and load your texture you want to convert and make sure BC7 is selected for the Color maps, for your normal map make sure BC5u is selected (The normal map will show as yellow in the icon, ignore it). Then Save As... .dds
Example

Info
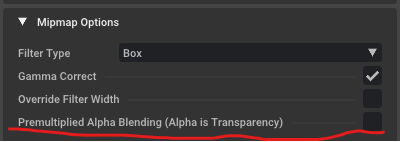
When saving the PRM texture make sure Premultiplied Alpha Blending is unchecked
Editing the Hedgehog Engine 2 materials
your model converter will have made .material files, you may even be using them. Remember their names and delete them. It is generally better to modify pre existing materials as it will look better because they include all the shader parameters.
A good base to modify off of is Sonic's cloth, since it is a common prm shader.
Duplicate and rename the material file you're building off of to the material name the model converter outputted.

Open HedgeEdit, then navigate to Edit > Material Editor
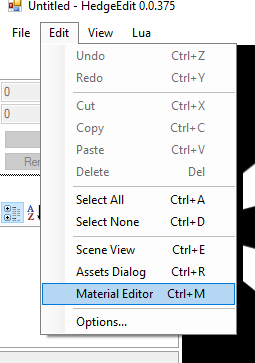
Once the pop up opened use File > Open to open one of the .material file you made. Then hit the ... next to Textures (Collection)
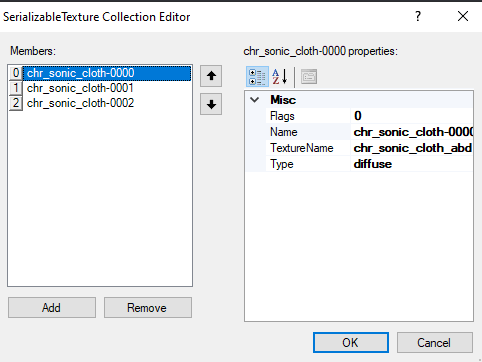
Each of these members are textures the material feeds the shader. What's important is there's 3 and they should correlate to the textures we made earlier.
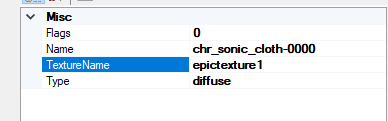
Select each member and set TextureName to the filename of the .dds we made earlier without the file extension
Note
If you chose to edit a nondefault material (IE Sonics fur) you may need to go to the Parameters section to get the members for the parameters.
Usually texture suffixes like fal go to falloffs, flw flow maps, fur noise layer overlayed on the diffuse for the fur.
Save the material then you're done.