How To Import Custom Collision in Sonic Generations
Part 1 (Creating Collision in Blender)
You'll need a separate model for the collision. While it is possible to use your stage's model files as a collision, we still recommend that you create a separate project/model for it, even if it's a copy of it.
It is possible to specify tags for your collision, which control the type of collision it has. For this, you'll need a special ini file for HavokConverter with tags. You can download it here. To apply these tags to your collision model, you can simply rename the meshes and add the tag as a prefix to its name. Below is an example of how you can do this, in case you want a mesh to have the "Stone" collision tag:
Example

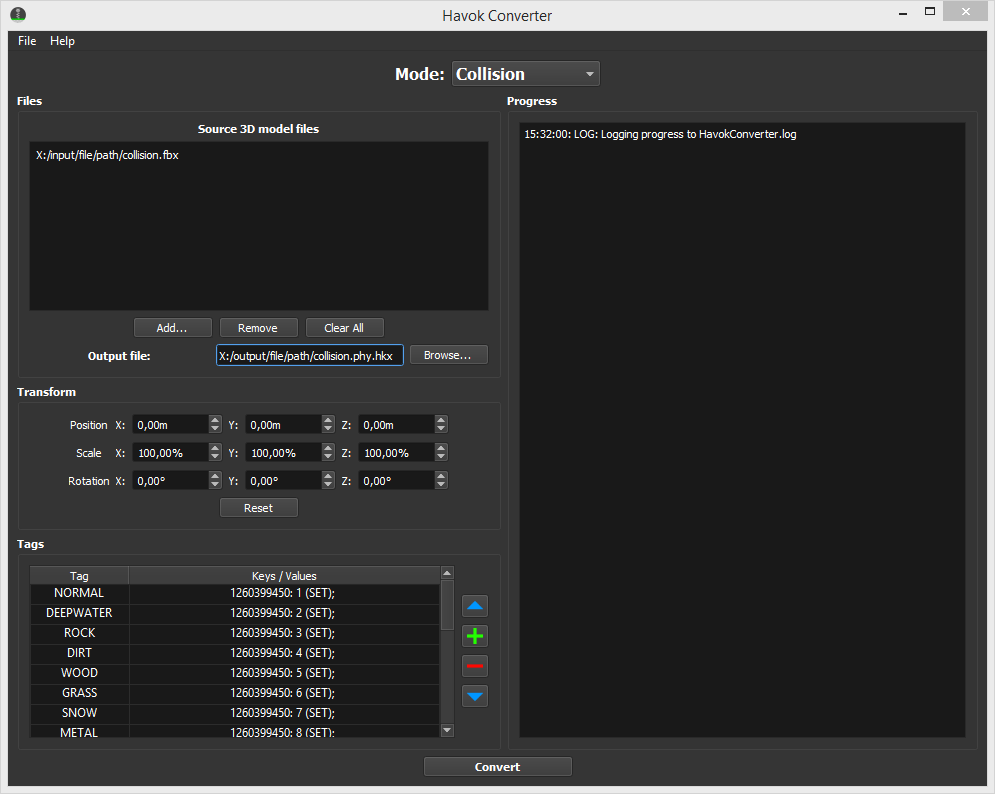
You can find all the available tags by opening HavokConverter after placing the mentioned INI file in the same folder as its executable.
Part 2 (Converting Your Model Into a Collision File)
Open HavokConverter.exe and fill the following options:
- Source 3D model files - Your collision model files
- Output file - Directory which will contain the converted collision (add phy.hkx in the end of the name)
Now you can click the Convert button and wait.
Part 3 (Importing Your Collision into the Game)
When the conversion process finishes, extract your custom stage's # file, and place the generated phy.hkx file there. Afterwards, open the Terrain.stg.xml file, and edit the collision file that is mentioned. This is mentioned in the RigidBodyContainer tag. Change its value to your phy.hkx filename, without the extension. Below is an example for a file name MyCollision.phy.hkx:

Now re-pack this file and replace the original. After booting into the game, you should now notice that your level has working collision.